Mexican "Rice"

Monday, November 1, 2010

Short post, and a super simple recipe, but it totally killed my craving for Mexican Rice today:

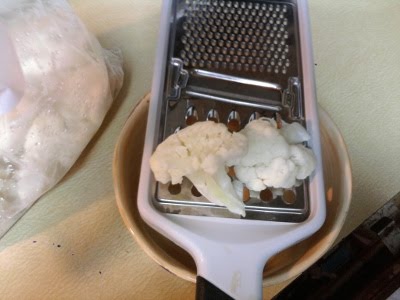
1/4 cup of grated steamed cauliflower
1 tbs of real bacon bits
1 tbs cream cheese
1 tbs salsa

Place in a bowl. Microwave for 30 seconds. Stir. Microwave for another 30 seconds. Stir. Try not to burn your mouth as you devour this.

Eggy Muffins!

Sunday, October 31, 2010

I'm horrible about updating this blog, but I have an excuse. My health took a significant turn for the worse just as I started grad school. Since I had very limited mental resources, I decided that writing copious amounts of papers and reports on rocks was more important than writing blog posts, or even cooking. I do apologize for the absence, and my health has recovered a bit now that we discovered one of the biggest problems: Gluten! Did you know gluten is in almost everything? It's been a challenge to relearn to eat, and try to figure out what I can and can not have. I still have moments of depression when I wonder if things will ever get better, but for the most part, I am getting better about it.

I do admit, I fell off the low carb wagon once I got sick. I wasn't cooking for myself, and it was much easier to eat whatever was given to me. Also, we got a Mexican restaurant in town, and I am a sucker for homemade chips and salsa, and it was so much easier to order from them than cook when I was too sick to really stand for long. However, after talking to the owners, and expressing my health issues (and since they know we eat there at least once a week) they have actually come up with some low carb, gluten free options for me! They make fajitas now with seasonings and marinades that contain zero gluten and zero sugar. They also confirmed with their masa supplier that the corn tortillas have zero wheat products. (Yes, I know they aren't low carb, but one or two in the grand scheme of things is me learning moderation!)

So, one thing I've learned? Ask! If you are a regular customer somewhere, don't be afraid to ask what they use, what they can do, and how you can have a healthier meal.

Now, onto my new recipe. This is a variation on Cleochatra's famous Oopsie Rolls. I had read the recipe a few months ago, and filed it into the back of my mind. I had even tried to make it once, but didn't get my egg whites beaten sufficiently, so it ended up being a goopy mess. I ended up salvaging them by toasting them, but it still wasn't that great.

However, I was watching Cooking Channel yesterday, and one of the hosts was making a souffle. It dawned on me that Rev Rolls and Oopsie Rolls were, in essence, a souffle. So after a bit of research and thought, I decided to try to make muffin style Oopsie Rolls. I tweaked the recipe, and in the future, I plan on tweaking it a bit more with spices. I have dubbed these Eggy Muffins. I used more egg yolks than whites because I found it gave a more substantial roll.

Ingredients:
4 egg yolks
3 egg whites
3 ounces of neufatel cheese (often sold as reduced fat cream cheese, is lower carb than cream cheese), very cold
1/4 tsp cream of tartar
1 tsp salt (next time I am going to use more)
1 package of stevia

Equipment:
A muffin pan that will hold at least 7 muffins
mixer with an egg beater attachment and and a mixer attachment
two bowls
an oven
1/4 cup measuring cup

Beat your egg whites and cream of tartar until they form stiff peaks. My good rule of thumb is to beat them and once you think you have stiff peaks, beat them for another 60 seconds. You want them as absolutely as stiff as possible. This will form the body of your muffin.

After your eggs are beaten, mix the remaining ingredients and mix until WELL blended. Once again, mix about 60 seconds longer than you think you need to mix.

Gently fold the yolk mixture into the eggs about a half at a time. This is a HUGE thing. I tried it the other way (whites into yolks) and it absolutely messed it all up. So trust me on this. Don't over mix it. If you still see some white and some yellow, it's okay!

Using a 1/4 cup measuring cup, pour the batter into greased muffin tins. I didn't use papers, but I likely will next time. This made 7 muffins for me, but depending on your muffin tin size, you might have more. Bake at 300 degrees for 30 minutes, turn the muffin pan and then bake for another 15 minutes, or until a knife comes out clean.

Now, this is the most important step of the whole process - Take the muffins pans and place them on a rack and leave them for at least an hour. After that hour, remove from the pans and put them back on the rack for another 12 hours. Make it 24 if you can stand it. The muffins need a chance to dry. After this, store them in an OPEN plastic bag on the counter.

These are a bit bland, I agree, but this morning I split one in half, added a tiny bit of cheese and some bacon, microwaved it for 30 seconds, and it was as close as I've ever come to an egg mcmuffin in a LONG time. I think next time I am going to add some more salt, and some spices. I think that cheese could be added reasonably well, maybe garlic and cheese and make some faux Red Lobster rolls? The possibilities are endless, really.

Nutritional:
Each Eggy Muffin has .8 carbs (I count them as 1) and 59 calories.

Sushi Revisited

Tuesday, July 27, 2010

Today for lunch I had a hankering for sushi. I already had some sushi rice made, so it was just a matter of debating what to put in it. I was out of shrimp, and I don't trust frozen fish for the raw treatment. It was too hot to go out to the garden, so I decided to scavenge the freezer/fridge for something to fill my sushi.

I had some leftover cooked salmon fillets, so after doing a bit of googling (Google? What can't it solve?) I decided to do what I call "Spicy Salmon Rolls." I have changed my sushi rice recipe a bit. I've discovered that American Neufchâtel cheese has a lower carb count than cream cheese for the same flavor and texture (it's also lower fat, but I care about the carbs here)

2 ounces cooked salmon, sliced in half so you have two long strips.
1 pickle spear, sliced into long, thin slivers
1 tbs mayo
2 drops of hot sauce

For the rice:
1/2 cup calui-rice
2 drops basalmic vinegar
1/2 tsp of granular splenda
1 tbs of American Neufchâtel cheese.

Assemble like sushi. Nom.

Makes 8 rolls.

Each roll has:
Carbs: .7
Fiber: .3
Net Carbs: .4
Protien: 2.3

Yes, I ate all 8 pieces. I have no shame.

Sushi for Under 3 Carbs?

Tuesday, July 13, 2010

I must admit, of all the things one must give up for a low carb lifestyle, I miss the sushi the most. It's just the best thing in the world. However, being creative and hungry, I began to deconstruct sushi to its barest elements, and then reconstruct it using low carb ingredients.

The three elements of sushi:
1. Nori wrapper
2. Rice
3. Filling

The first was easy to rectify after a trip to the store, after I discovered that the small hand roll (4 pieces) wrappers are .5 carbs with .3 fiber. So, a grand total of .2 net carbs. On the grand scale of things, considering the amount of taste and beauty you get for that nori wrapper, it's a bargain! So, whatever I did, nori wrappers fit with a low carb product.

The second part is the rice. If you are a regular reader of the blog, you know I love to talk about riced cauliflower or “cauli-rice.” I make a killer origini using my tried and true recipe with cream cheese. After trial and error, I have found a few other methods that work as well to make the rice “sticky.” A tablespoon of mayo works well, and with a few drops of vinegar and a pinch of splenda, it makes for a very close aproximation. If you want to mimic wasabi, but don't want to spend the calories, a dash of horseradish in the mayo will give it that kick, though not the color. (And since most US wasabi is nothing more than colored horseradish paste anyway, with a few additives, it will taste similar!)

There is a VERY important step you must take, however, before you turn your cauliflower into rice if you are using it for sushi. After you have steamed it, put the cauliflower in a large colander lined with paper towels and let it sit and let as much moisture as possible soak off while it cools. It will make the rice stick together more and also keep your rolls from being soggy.

The third was easy, because there are so many low carb options for a filling. You can always go traditional, and have salmon or tuna, but getting sushi grade fish isn't always easy, and I wanted something I could pack in a lunch with some confidence. However, any of the following would be great filling and have a low carb punch:

Crab meat
Sushi grade tuna or salmon
cooked shrimp
avacado
strips of scrambled egg
smoked salmon
You can even make a more “western” roll if you so desire and add a bit of chicken or tuna salad.

For contrast, I usually like to have some sort of crunchy veggie in my rolls. Juliened snow peas, cucumber, scallions, sprouts, asparagus, or really any Atkins friendly veggie cut into thin slices works well. While I sometimes make meat only regular rolls, I have found that with the cauli-rice, that extra crunch just brings something to the roll that I can't describe.

For my bento today (featured in my blog Low Carb Bento) I made four pieces of shrimp and snow pea sushi.

Rice:
.5 cup cauliflower rice
.5 tsp Horseradish sauce
1 tbs mayo
2 drops vinegar
1 pinch of granulated splenda or stevia

combined all of the above ingredients together and use as you would traditional sushi rice

Filling:
2 large shrimp, cooked, peeled, deveined
1 snow pea, cut into long, thin strips.

If you don't know how to make sushi rolls, this video will explain it better than I could.


Nutrition:

Carbs: 4.5
Fiber: 2.3
Net carbs 2.2
Calories 45

Green Goddess Tuna

Friday, July 9, 2010

I admit, I've not been blogging much, either here or at Low Carb Bento. That has mostly been because I've been very sick the past few weeks. I live in the country, and in order to see my specialist or have extensive tests run, I have to drive about two hours into the city. The long day of waiting, scans, blood work and doctors tends to wear me out, and topped with my many other real life obligations, it's taken me a bit to get myself back on track, especially when it's easier for me to just grab fast food (which I did) or indulge in sweets (which I did.)

However, I did get the new Atkins book, and read it, and I noticed how much better I feel on my diet. It makes a significant difference in my health, so I am back on track starting today. I am still run down and tired, so making food that is easy and tasty has been the goal. I am a huge fan of bento style lunches (as is evident with my other blog), so I wanted something that would work well in my lunch as well.

This version of tuna isn't really that different from normal tuna, which we all made with a blob of mayo and a can of tuna. It's amazing how different using a few herbs and spices can make a humble food.

I named this Green Goddess Tuna because it reminds me a bit of homemade Green Goddess dressing. It is best made the night before and left in the fridge so all the flavors can mellow, or made in the morning for lunchtime.

Green Goddess Tuna

1 can of tuna, drained
1 tsp cilantro, dried /1 tbs fresh chopped
1 tsp basil, dried /1 tbs fresh chopped
1 tsp olive oil
2 tbs mayonnaise
1/2 tsp ranch dressing mix

Mix all of the ingredients together and let sit for at least 20 minutes.

Calories 236
Total Fat 14.0g
Cholesterol 30mg
Sodium 154mg
Total Carbohydrates 3.6g
Protein 22.7g

Cauli-Rice Onigiri

Thursday, June 17, 2010

First, I will freely admit a good deal of my technique is inspired by Just Bento/Just Hungry's onigiri tutorial. Feel free to head over there for some great recipes, ideas and another angle on how to make this treat. Her's are decidedly NOT low carb! I took pictures of my process and explained how I did it because there are some differences, but the basics are the same.


You will need:
Hardware:
Bowl to hold your cauliflower
Grater or food processor
Plastic wrap
A cup or small container that holds aproximately 1 cup
spoon

Software:
1 bag of frozen cauliflower, or one head of cauliflower, cut up (will produce about 2.5 cups of cauli-rice)
2-3 tbs of cream cheese
Sea Salt
Bacon bits, or some other filling.

Before we begin: cook your cauliflower. I have discovered it is easier to process cooked. I normally take my cauliflower and microwave it for 5 minutes for fresh or 7 minutes for frozen. For this process I did it the night before.


Grate your cauliflower on the largest holes of your grater, or process in a food processor until slightly larger than rice grains.


When you are done, it will look like this. If you are using leftover/cold cauliflower, I usually microwave it for 2-3 minutes to warm it up. If it's freshly cooked, you can skip this step and move to the next one.


Add 2-3 tablespoons of cream cheese and stir a bit, then microwave for another 30 seconds to soften the cream cheese. Once it comes out of the microwave, stir until combined. You might need to add a bit more cream cheese depending on how much cauli-rice you have.


Once your cauli-rice sticks together well, and can be squished into the spoon and stay, you are ready to make onigiri!


First, place a piece of plastic wrap in your container. Make sure it's large enough to go over the sides. You will need to be able to wrap your balls completely in the wrap.


Second, lightly fill the cup 3/4 of the way full, making sure not to pack it heavily.


Third, using your finger, chopstick or small spoon, make an indentation in the middle of the cauli-rice and fill with your filling. I used bacon bits, YUM!


Next, place another spoonful of cauli-rice on top, and pat down.


Finally, gather up the plastic over the ball, and twist.

After this step, if you want to shape it, I strongly recommend putting it in the fridge for at least 10 minutes to let the cream cheese resolidify. You can then shape it into the traditional triangle, or square, or even some other cute shape.

I keep these wrapped in plastic in the fridge for 3-4 days, but they rarely last that long.


Here is the finished product, with some fresh cracked pepper on top in today's bento.

If you want to see more low carb bento boxes, feel free to visit my other blog Low Carb Bento.

Faux Sushi Rice

Saturday, June 12, 2010

I've been playing around with riced cauliflower a lot this week. I am a huge fan of bento meals, and prior to eating LC, I loved onigiri, which is a savory rice ball, usually with a filling. It's a staple of "bento style" lunches, so I set out to make up a recipe for rice that would work that was:

1. Low carb
2. Not a lot of dairy/cheese
3. Yummy

This can be used for onigiri, and also sushi, as long as you use it while hot.

This recipe will make 2 rice balls or 3-4 sushi rolls.

1 cup frozen cauliflower
1/2 tsp sea salt
1 tbs cream cheese (I use one that is 1 carb per ounce)

Place the cauliflower and salt in a microwave safe bowl and cover. Microwave for 5 minutes.

Let it cool, take out of the bowl and either grate using a hand grater, or pulse in the food processor until the cauliflower is rice sized

Add the riced cauliflower back to the bowl and add cream cheese. Microwave for 30 seconds then stir until the cheese is completely integrated into the cauliflower.

You can use this to make sushi rolls or my favorite bacon filled rice balls. I'll have a tutorial about how to make them this week!

Low Carb Foodie Copyright © 2009 Designed by Ipietoon Blogger Template for Bie Blogger Template Vector by DaPino